Growing from seed can be both rewarding and frustrating. When a seed first germinates, and you see life popping out of the soil, it brings so much joy and excitement with it. It’s fulfilling to watch a seed turn into a plant, that later provides food or flowers. However, there are many weeks during the growing stage where things can go wrong, and you’ll find yourself asking “what’s wrong with my plant?”
Below is a list of 7 common problems that can arise with seedlings. This list is not exhaustive, and you may run into other issues, however these are very common situations.
Leggy/Stretching for Light


What leggy seedlings look like
The first photo of kale is an example of leggy plants. This is when plants have really long stems (the space between the soil and the leaves) where often times the plants are toppled over on their sides.
The second photo of corn is an example of plants stretching for light. Instead of growing in an upright manner towards the sky, all plants are stretching to one specific direction.
What it means to have leggy seedlings
Both leggy and stretching plants are caused by the same issue, a lack of light. The leggy plants are not getting enough light so they’re growing as tall as possible to find it. The plants that are stretching for light are telling you that the light isn’t strong enough, and are trying to get as close to the light as possible.
Why leggy seedlings are a problem
Plants need sufficient light to grow strong stems. When a plant is leggy and looking for light, it stretches its stem significantly longer than it would with proper sunlight, making it very weak. This is why you often see it laying on the soil. Weak stems mean that the plant won’t be able to support fruit, or keep itself protected from strong winds. If the plant is stretching for light, but doesn’t have an extremely long stem, the problem is that it’s not getting sufficient light for it’s needs, but it hasn’t impacted the plant permanently.
How to fix leggy seedlings
Let’s start with the easy one. Plants that are reaching for light (reminder, the second photo of corn) need to be moved closer to your grow lights. Once they’re properly under light, they will adjust themselves back upright, and your problem is solved.
Now to leggy plants. Often leggy plants happen because the seeds are being grown on a windowsill that just isn’t bright enough. Seedlings need 12+ hours of direct light to grow healthy and strong. When this situation happens, the majority of the time, it can’t be fixed. The best option is to start over by planting new seeds. To avoid this from happening again, ensure that your seeds are under a grow light that is no more than 4 inches above the plants, for at least 12 hours a day.
I mentioned that the majority of the time it can’t be fixed, however there are a few cases when leggy seedlings can be fixed. In particular, when growing plants in the nightshade family, such as tomatoes, eggplants or peppers, there is a chance of saving these seedlings. Plants in this family can grow roots from their stems. Therefore, if you replant your seedlings in new soil, and plant the stem almost as deep as the first set of leaves, the stem should grow roots and allow the plant to continue growing as if it never happened at all.

Damping Off
What damping off looks like
If you wake up one morning, check on your seedlings and notice an entire tray where every plant has tipped over and looks dead, that is damping off. Beyond all the plants being dead, a tell-tale sign is that the stem is shriveled up where it meets the soil.
What damping off means
Damping off is caused by bacterial issues in your soil. If the soil you used for growing seedlings is old or has been used before, it can cause this issue. Soil gnats also have the ability to transfer bacteria into the soil that causes damping off. However, sometimes you can do everything right and damping off can still happen. There are no warning signs it’s about to happen.
How to fix damping off
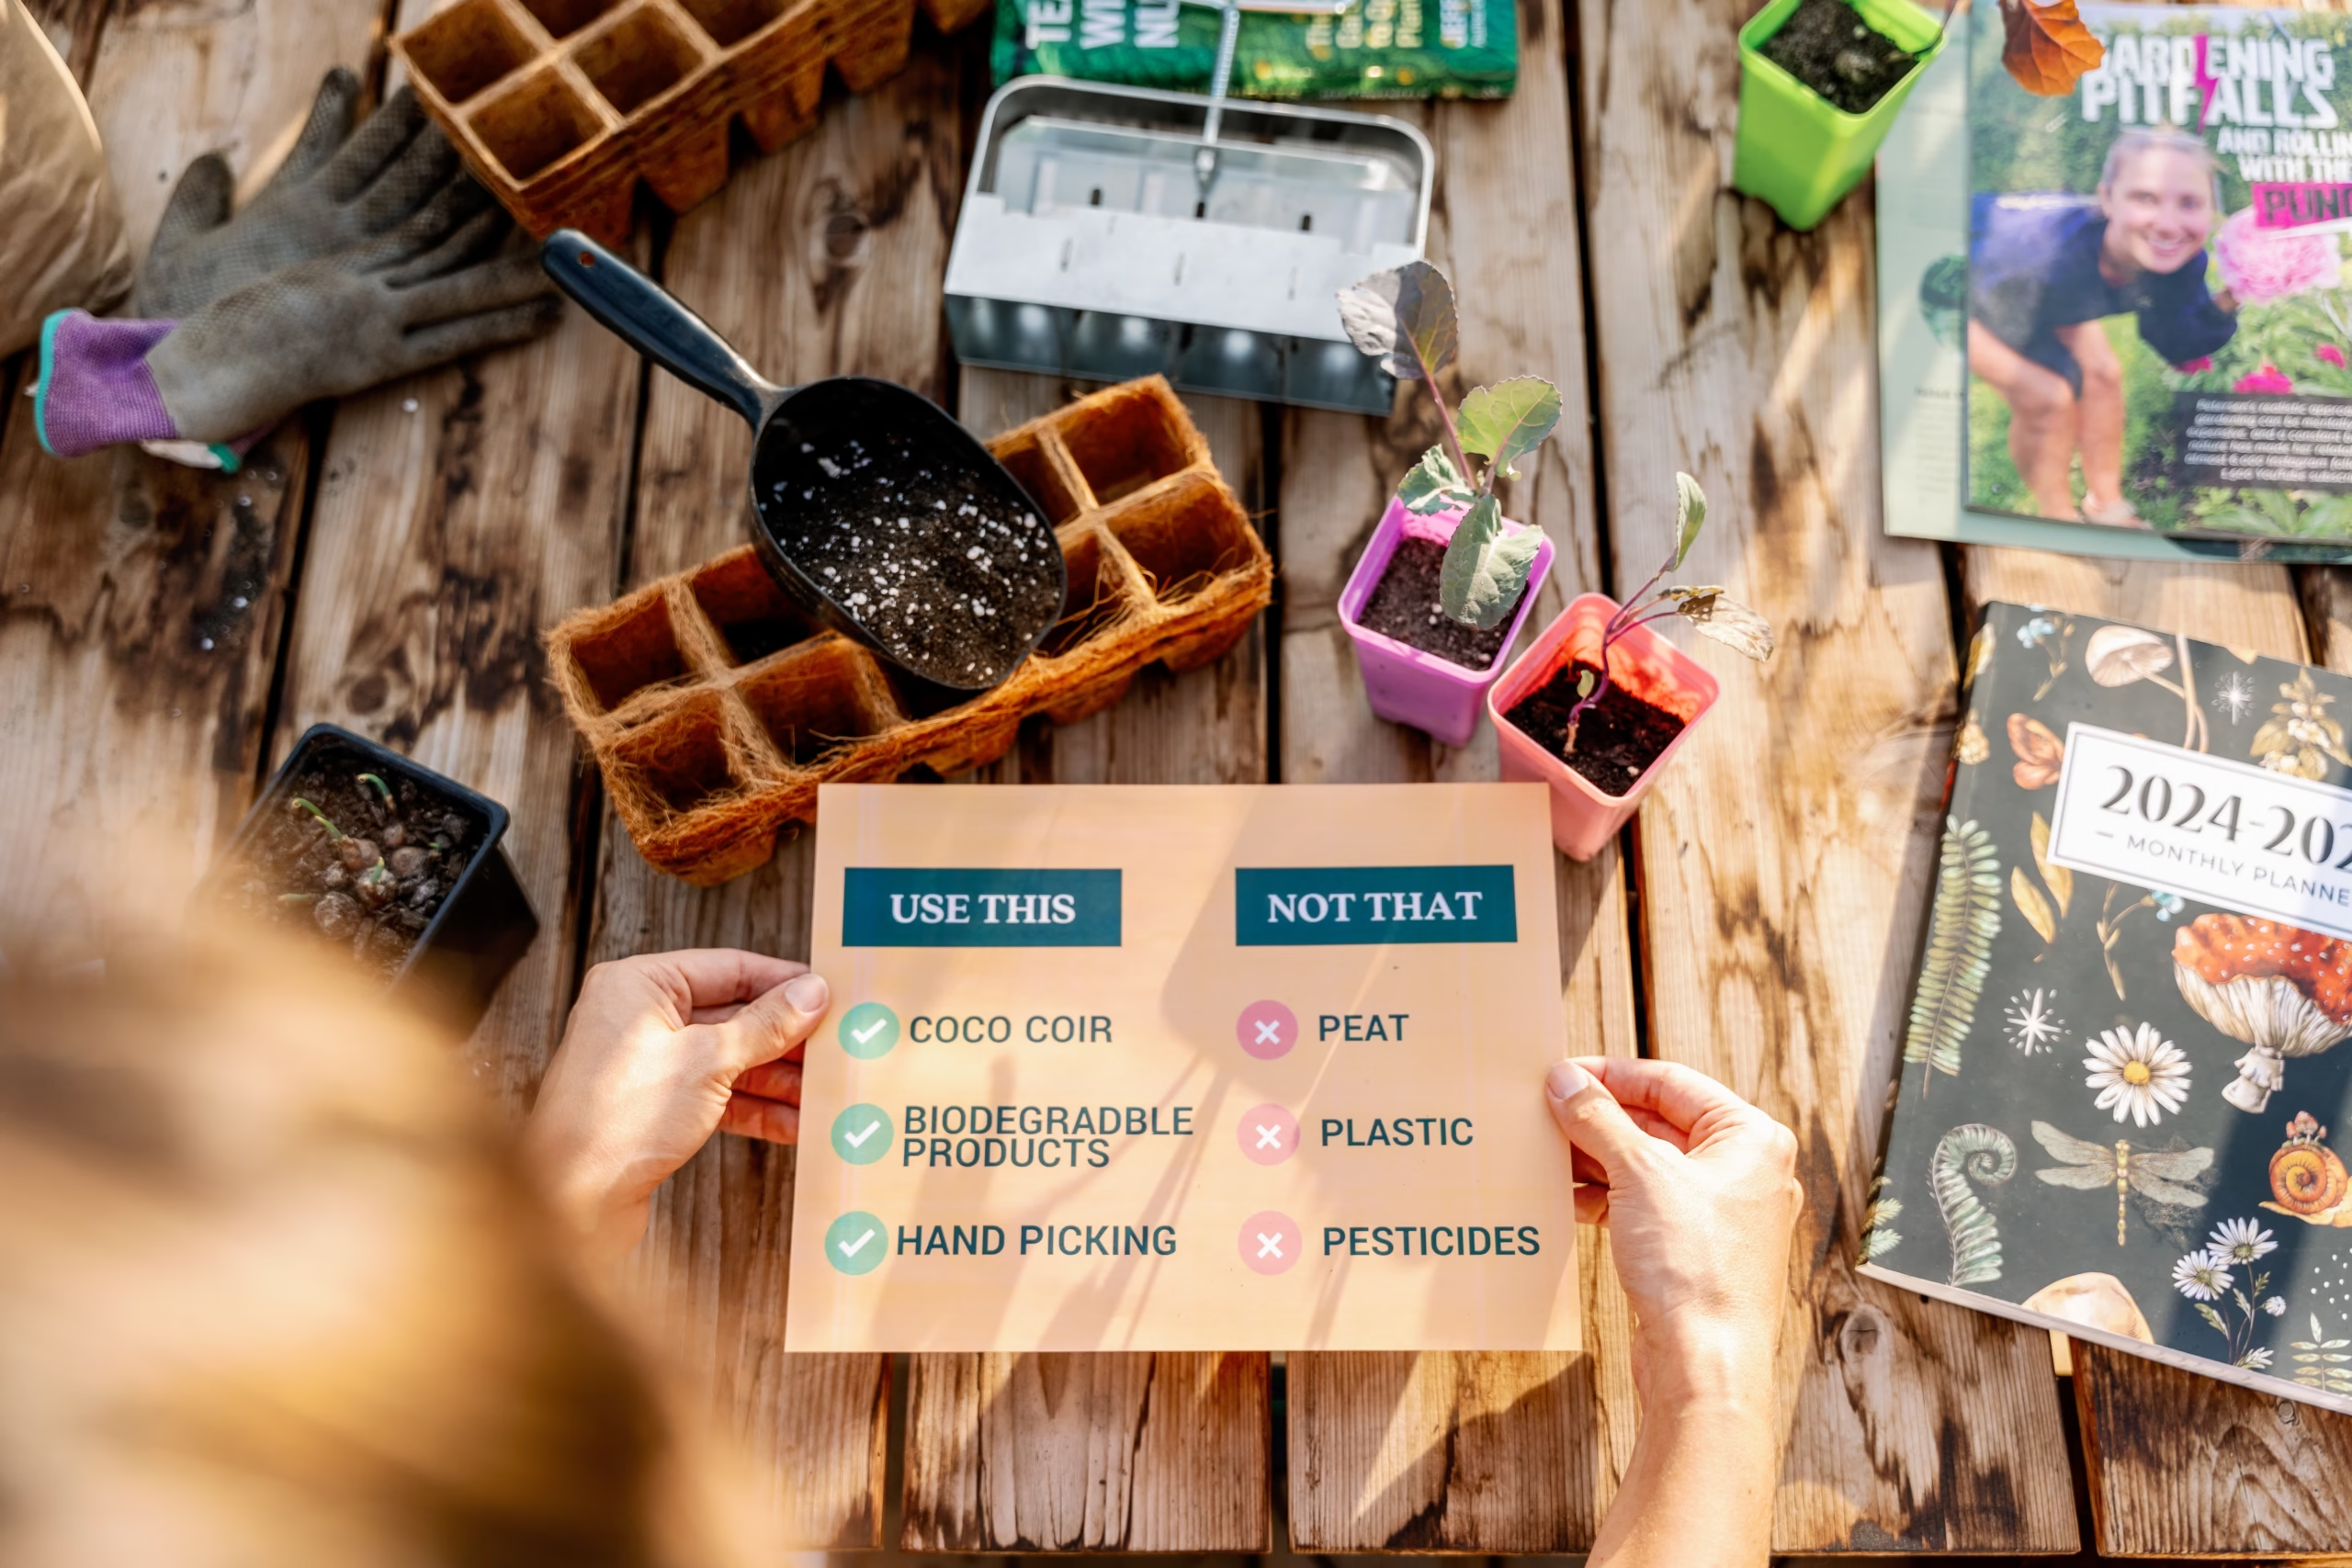
Unfortunately, there is no fix to this situation. The only option is to plant new seeds. Make sure you are using new, sterile soil when starting your seeds. We have an article on peat-free seed starting soil that you can make at home – so that you know exactly what is in your soil.
White Leaves

What plant sunburn looks like
If your plant is close, or is touching your grow lights and you notice that the leaves have turned white, then your leaves have been burnt. You may also notice this on your plants after bringing them in after a day of hardening off outdoors.
What it means to sunburn your plants
Your plant got a sunburn! If your plants are touching your grow lights, it can cause a sunburn which looks like white areas on the leaves. It doesn’t happen incredibly often, especially if you’re raising your grow lights as the plants grow, but it can happen. This is much more common when hardening off your seedlings outdoors.
Why plant sunburn is a problem
Because the plant burn is white, it means the leaf was damaged. Therefore, that specific leaf of the plant can no longer photosynthesize since the cells were damaged. If too many of the leaves gets sunburned, it will hinder it’s growth, as photosynthesis is vital for plant growth.
How to fix plant sunburn
If the plant received sunburn indoors, move the plant to a spot where it can have space from the lights. Always increase the height of the lights to allow the plant more room to grow. If the plant was sunburned during the outdoor hardening off stage, move the plant into the shade. Lessen the amount of direct sunline the plants are receiving, and have it spend more time in the shade, while slowly re-introducing it back to the sun. If only one or two leaves were damaged, this is all you need to do. If multiple leaves were damaged, consider removing the most damaged leaves to allow the plant to focus on healthy new growth.
Helmet Head

What it looks like
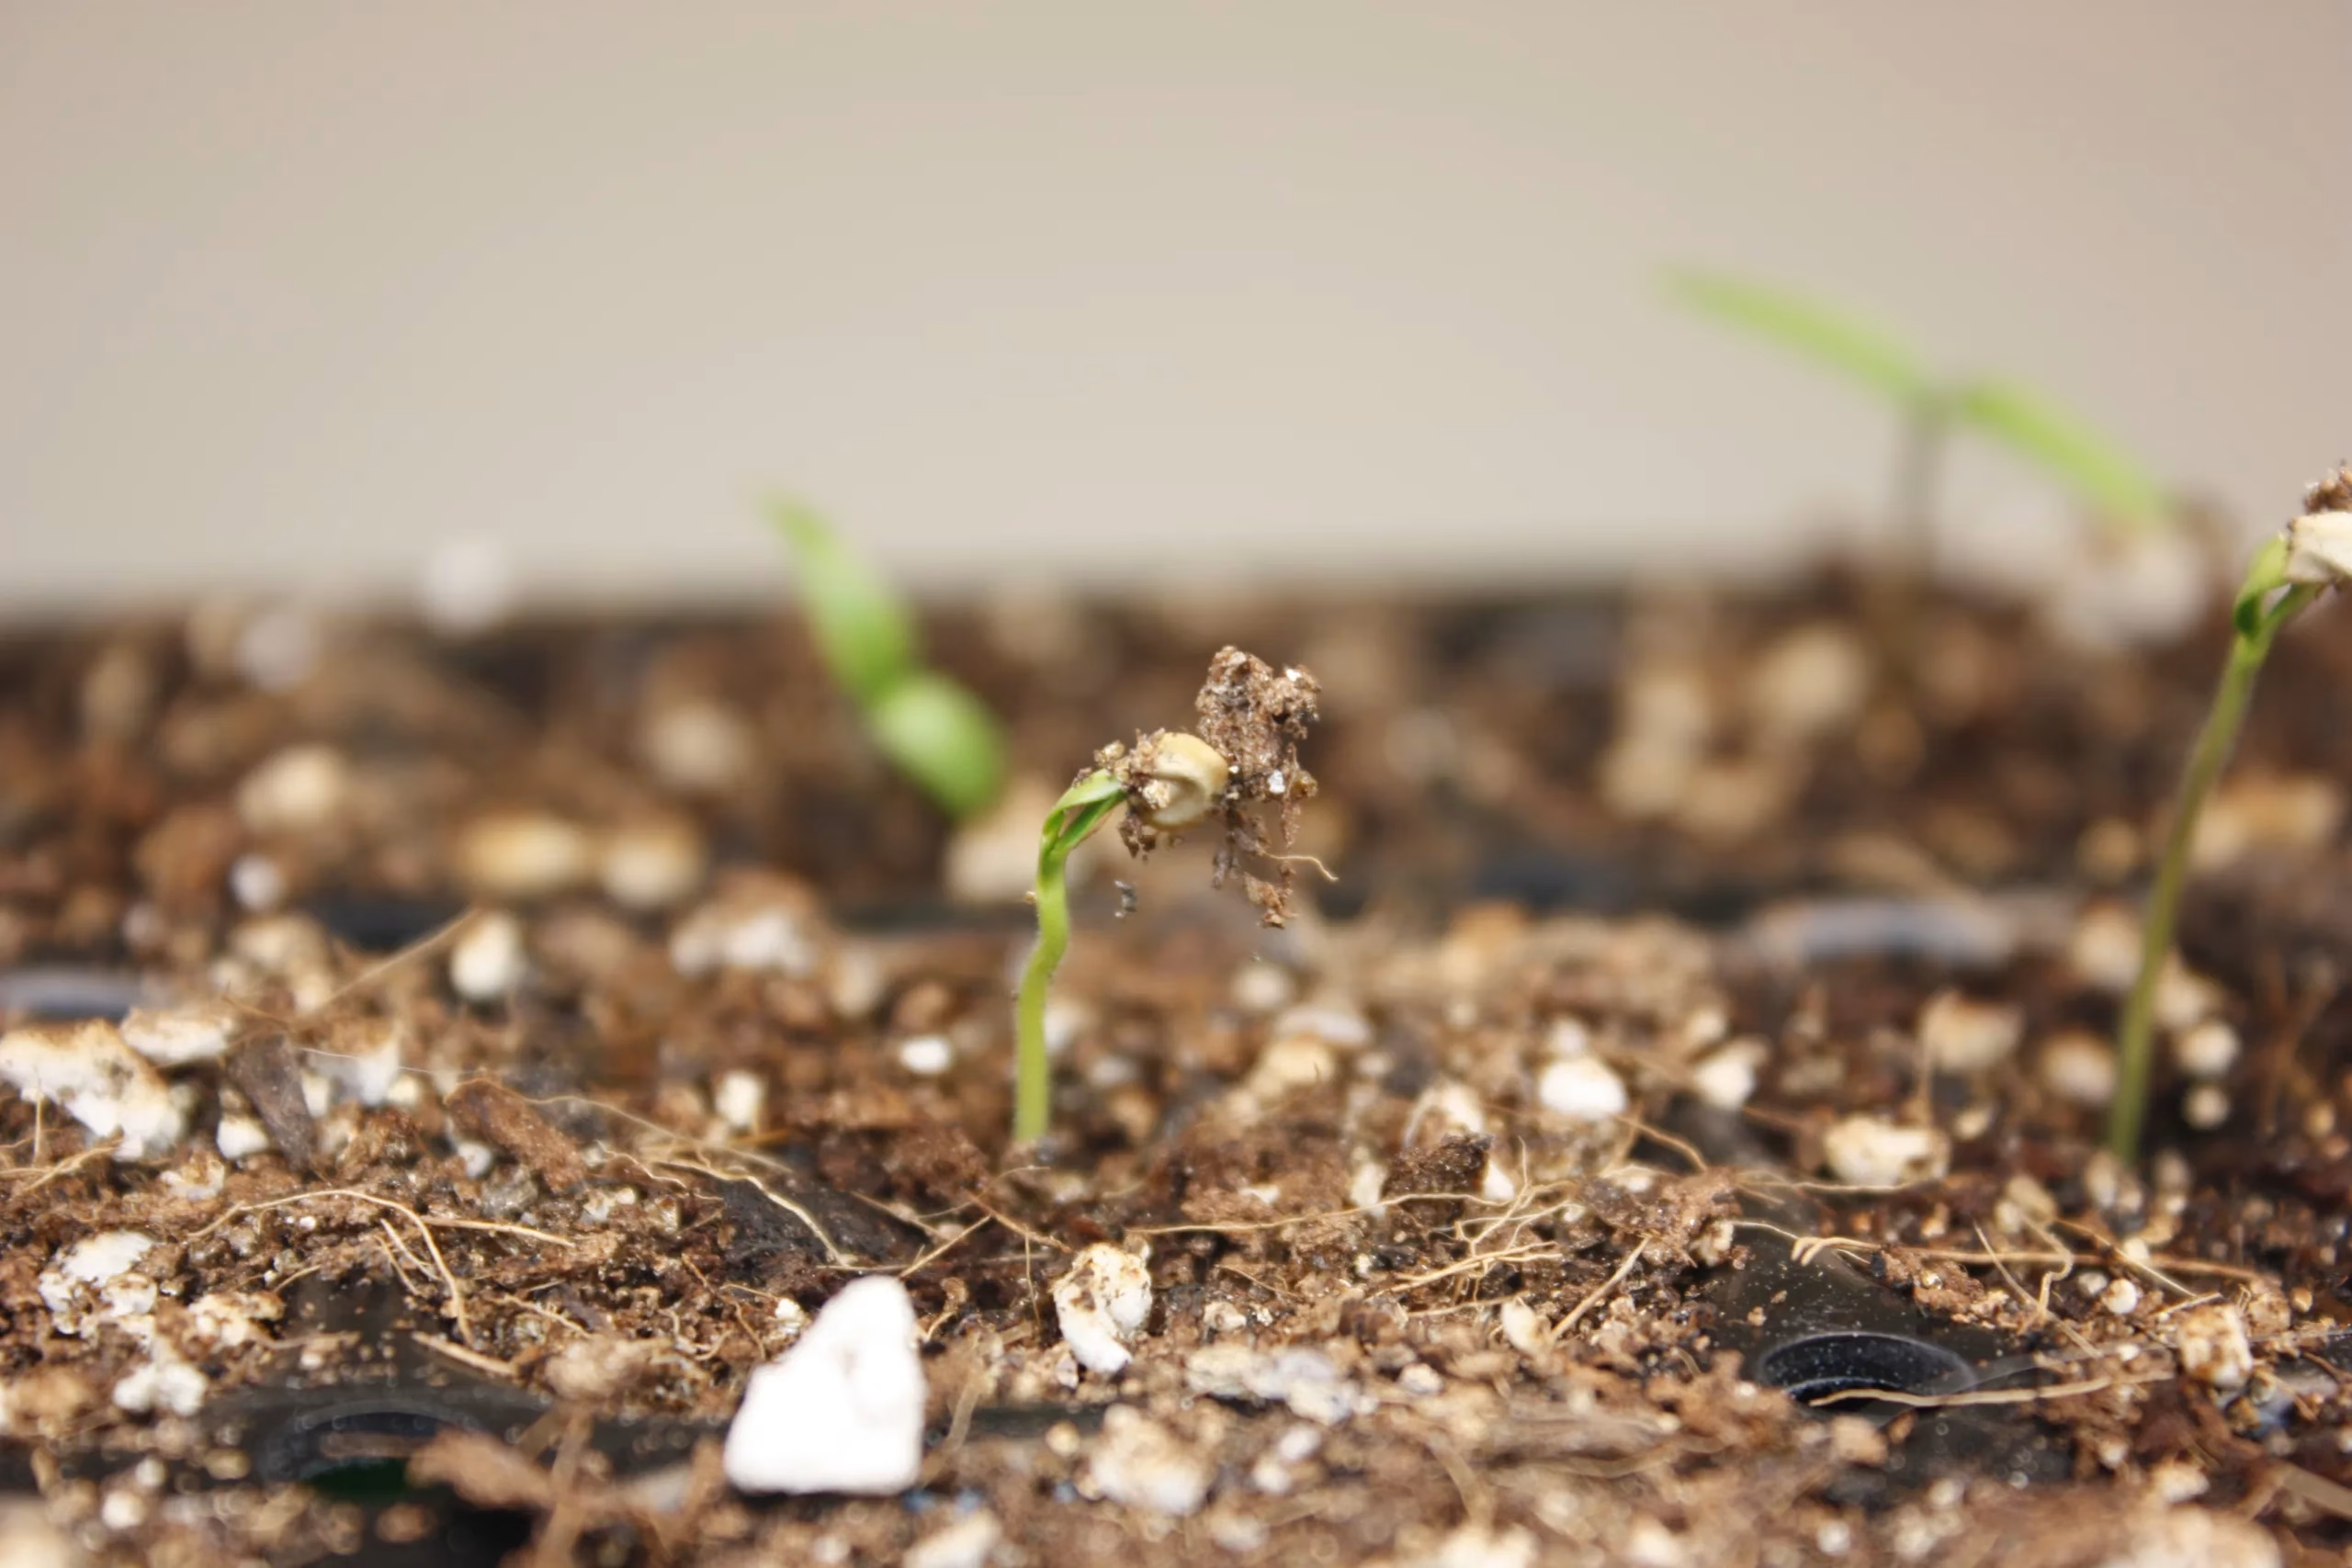
Okay, okay, I don’t think this is the official name of this seedling issue, but how better to describe it than a plant with it’s helmet (seed) still stuck on its head? If your seed has sprouted, and the plant is showing some, part or none of its leaves but the seed is still attached, this can be your issue. As the leaves start opening up, the seed should come off of the plant naturally.
What it means
This could be due to not planting the seed deep enough, which means the plant didn’t have enough time to shed the seed, or it can be a sign that the seed soil was too dry as the plant was sprouting.
Why it’s a problem
Once the seed sprouts, if the seed casing is still on the plant and none of the seed leaves are visible, there is no easy way to help the plant emerge from the seed. Additionally, if the seed coating remains on the leaves, it makes it difficult for the newly emerged seedling to photosynthesize and start growing new leaves since the leaves are being covered by the casing.
How to fix it
If the seedling has no leaves showing outside of the seed, and it’s been like this for multiple days, you can attempt to break the seed off of the plant. Most likely though you’ll break the leaves and kill the plant (but it’s worth a shot since it’ll die anyway). If this is your situation, assume that you need to replant your seeds.
If you can see a portion of the leaves, there are two ways you can try to remove the seed.
The first is to spray the seed with water. Once it’s wet, delicately try to slide the seed off the cotyledons. The second option is to delicately try and crack the seed in half to pull it off of the plant.
Plants are surprisingly resilient, and often will survive even if you rip the cotyledon leaves in half when trying to remove the seed coating. The main goal is to not break the stem, and to have at least partial leaves intact at the end.
Check out our other seed starting articles:
- Seedlings Randomly Die? Damping Off Could Be the Culprit
- How to Shop for Plant Seedlings at a Greenhouse
- Does the Seed Brand Matter? Dollar Store vs Nurseries
- 6 Tricks to Grow Massive Onions in Cold Climates
- Want a Huge Pepper Harvest? 6 Tips for Cold Climates
Stalled Growth
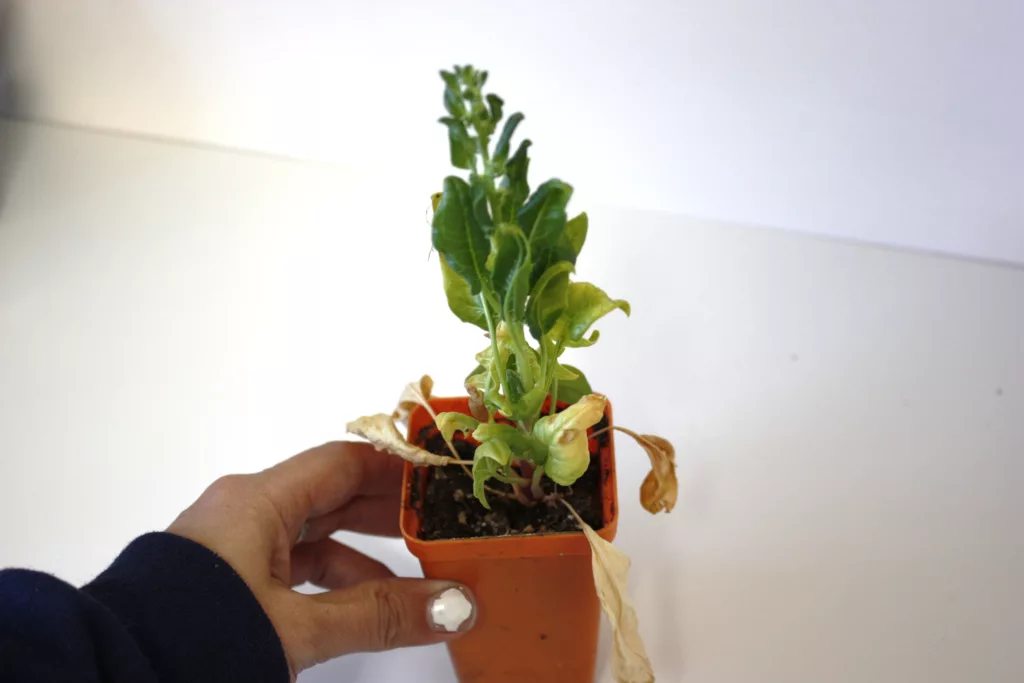
What stalled growth looks like
This issue is a little harder to diagnose. If you’re new to seed starting, and less familiar with the growth habits of seeds, it’ll be difficult to discern between stalled growth and impatience. However, if you follow the rules on your seed packet , a couple weeks have passed and you notice that your seeds haven’t grown any larger, or more than a couple new leaves, then you may be dealing with an issue of stalled growth.
What stalled growth means
Stalled growth means that your plant has slowed or completely stopped growing. This could be due to underwatering, low light, overcrowding or a lack of nutrients.
Why stalled growth is a Problem
If your plant growth is stunted, it might cause irreversible damage where the plant doesn’t think it should continue growing and will either do nothing, or will attempt to go to seed (like in the photo above of spinach). Additionally, stalled growth moves back timelines, meaning your plants won’t be ready to be planted outdoors by the time last frost arrives.
How to fix stalled growth
If you’re concerned that your plant is experiencing stalled growth, the two best ways to deal with it are, potting it up in a larger pot to give the roots more space to grow, and potting it in new soil to ensure there are adequate nutrients for the plant to continue its growth. Once you make these changes, be patient and give the plant a week or two to adjust and start growing again.
If in two weeks you don’t see any new progress (take a photo for reference!), start some new seeds, if time allows.
Little or No Germination

What poor germination looks like
The easiest way to know if your germination rate is low is by knowing how many seeds you planted to begin with. Most seed packets will provide the germination rate, so you can quickly calculate the number of seeds you planted vs how many germinated (no. of seeds that germinated divided by seeds planted). If this number matches the seed packet or is close to it, than you’re not experiencing any issues. However, if it doesn’t match, then you’re having a germination issue. If you’re unsure where this is on your seed packet, check out how to effectively read a seed packet.
What poor germination means
Excluding impatience, there are a number of reasons why seeds have poor or no germination. The first is that the seeds are old and are no longer viable. The second is the seeds may be of low quality and don’t have a good germination rate. The third is the seeds were not stored properly and lost their viability. And the fourth reason is you’ve overwatered or underwatered the seeds.
How to fix poor germination
The first step is to verify on the seed package how many days it takes to germination (some plants can take upwards of three weeks). If the number of days from when you planted your seeds until now is greater than the packages suggested, try planting new seeds. If it’s only been a few days since planting, have patience as seeds can take longer than expected. If the seeds are old, or were not stored properly, consider buying new seeds. Not all seed companies sell quality seeds, so it’s important to get seeds from a reputable company. A couple of my favourite seed companies include West Coast Seeds and William Dam.
Wilted/Fallen Over Plants

What wilted plants look like
Wilted or fallen over plants look similar to damping off. However, if only a few of the plants are wilting or fallen over, while others aren’t, this is likely to be a different issue than damping off.
What wilted plants mean
If you see some of your plants wilting or fallen over, but not all of them, it likely means that they are dry and need to be watered. Plants use water pressure to maintain their shape and form, so when they’re low on water, they wilt because they can’t maintain the pressure.
How to fix wilted plants
Easy! Give them some water. If your plants are still small and urgently need water, you can water them from above. However, I always recommend watering from below to help create stronger roots. This method can take longer as the water is absorbed by the soil, so you can do a mix of bottom and surface watering to speed up the process. Just be careful not to over water!
Pests on Seedlings

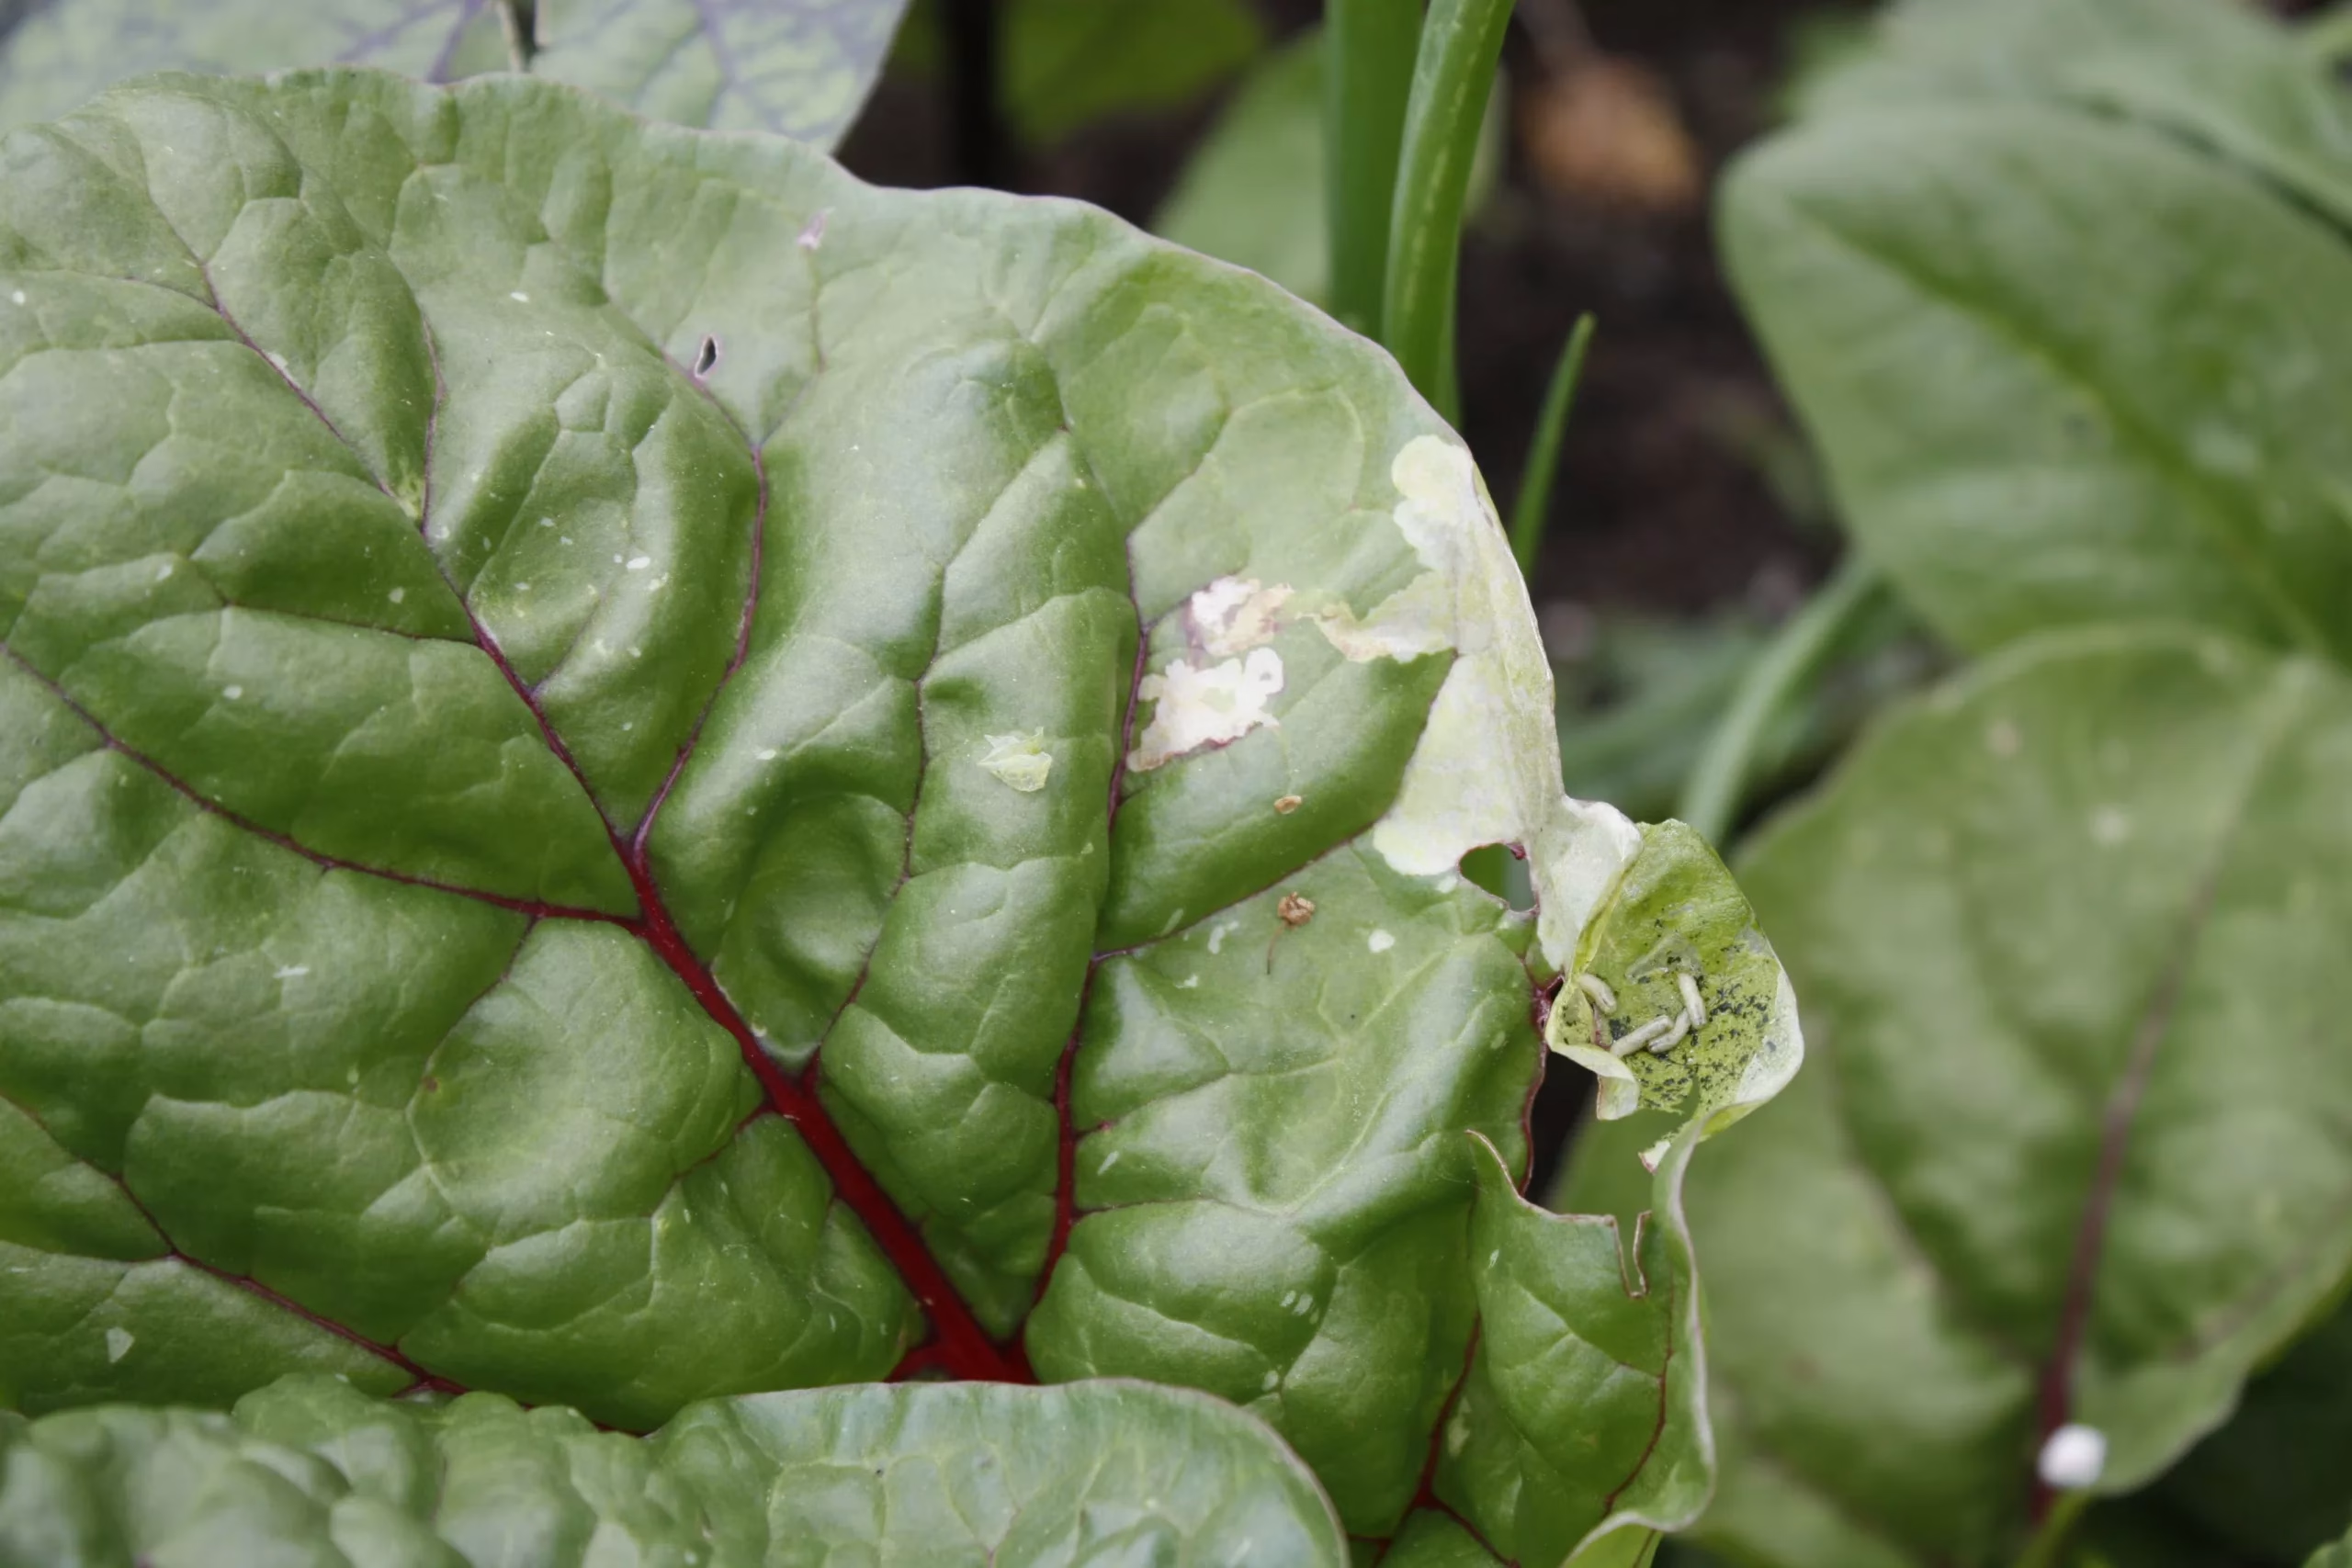
What it looks like when your seedlings have pests
Unfortunately pests can be hard to spot on seedlings, especially if you don’t know to look for them! Common pests include aphids, whiteflies, gnats or mealybugs. The above photo is of aphids on the underside of pepper seedlings (the dark green dots in the centre of the photo). If you notice the leaf on the left of the aphids, you’ll see it looks pale with white-ish spots. Plants with pest issues often look sick, like this leaf. When it comes to gnats and whiteflies, they’re more irritating than harmful.
What it means when your seedlings have pests
Having pests on seedlings is not fun. Somewhere along the way, the soil was contaminated with insect eggs that hatched and decided to enjoy the fruits of your labour. You now have to assess the specific pest you are dealing with as each has a specific method to manage it.
Why it’s a problem to have pests
Aphids in particular are troublesome as they multiply at exceptional rates. They will kill your seedlings if you are not on top of their populations. Because they feed on the soft tissue of the plants, and seedlings are generally too small to handle this damage, they will die if not taken care of. Mealybugs are similar to aphids, where they feed on the plant. However, they are easier to spot and to manage. Gnats and whiteflies don’t cause major issues with plants, however they are very annoying.
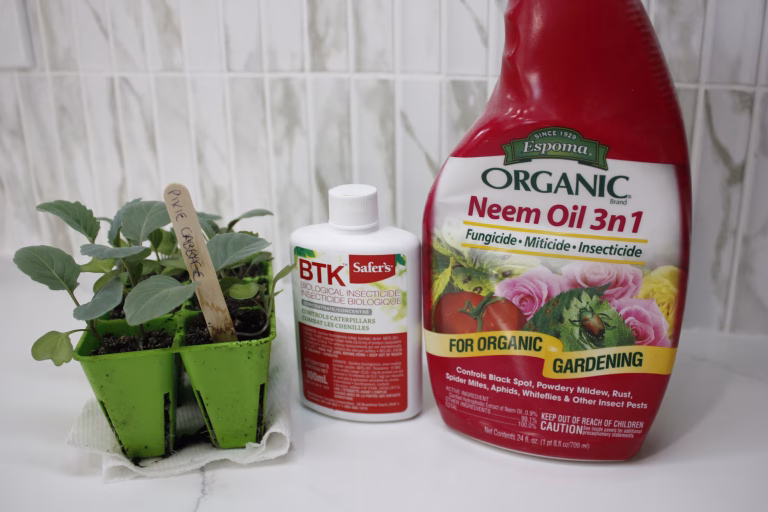
How to fix your pest problems
If you have gnats or whiteflies, invest in sticky traps such as these. They are easy to use and quite effective. If you have mealybugs or aphids, you will have to check your seedlings every day and wash the bugs off. If they are in harder to reach places, you can take a piece of tape and wrap it around your finger with the sticky side out, and grab the bugs with the tape. It’s important to clean them daily until you no longer see them. Then, check back weekly to ensure they have not returned.
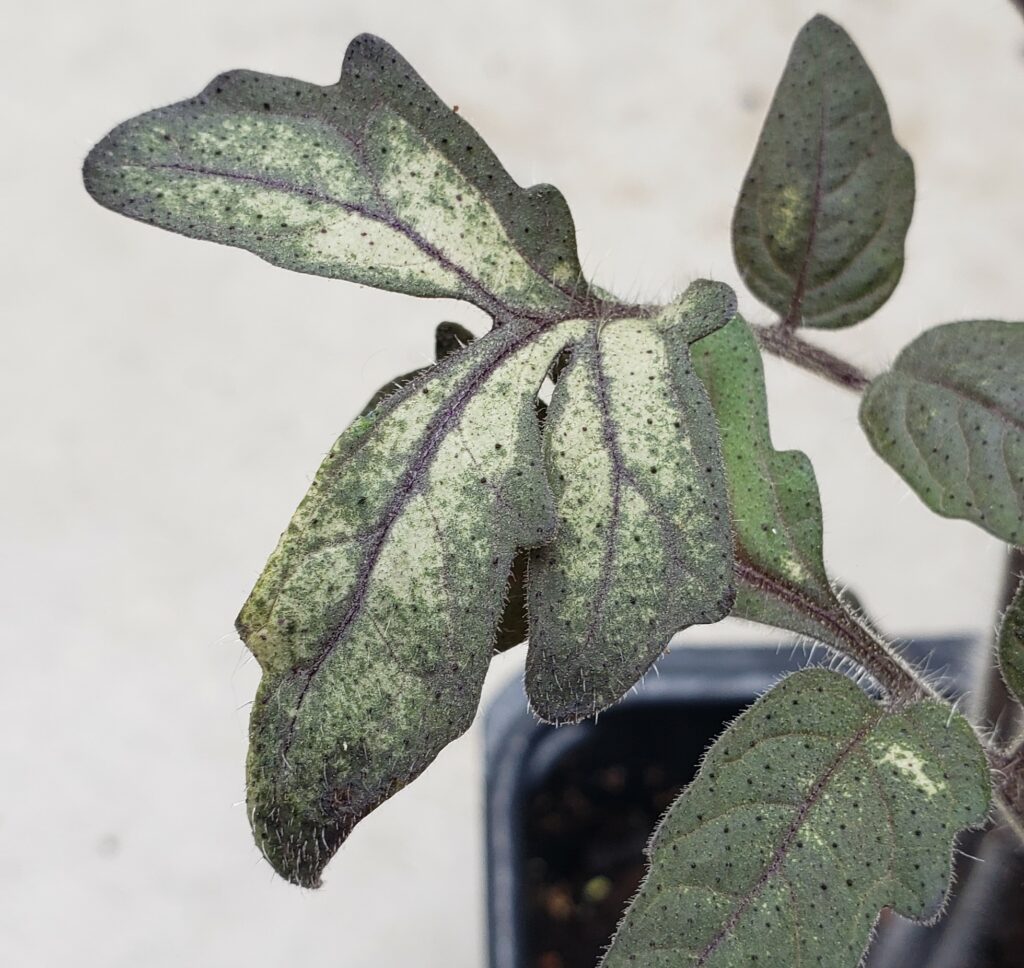
Purple Leaves on Seedlings
What purple leaves look like
The leaves of your plant have far more purple in them than expected, or have dark purple spots on the leaves. This is specifically for varieties where the leaves should be green (since there are varieties of plants that are meant to be purple!)
What it means to have purple leaves
There are two common reasons why your plant’s leaves will turn purple. The first is that there is an imbalance in nutrients and the purple is an indication of a phosphorous deficiency. The key determination is if you notice this in the older leaves of the plant (and not in the new), and if the plant has stunted or slow growth.
The second cause of purple leaves is watering your plants with cold water! The cold water can stress your plant out, causing it to increase production of anthocyanin which is what gives the leaves the purple colour.
Why it’s a problem to have purple leaves
If your plant is deficient in phosphorous it will cause issues with the growth of your plant. If your plant is stressed from cold temperatures such as from the water, this actually isn’t much of a problem and there is a potential that it can actually help the plant deal with stress in the future!
How to fix purple leaves
First, it’s important to diagnose if it’s your watering that is causing the purple leaves. Only water your plants with room temperature water, so fill your container and let it warm up overnight before watering your plants. If the new growth looks healthy and normal, then you’re good to go! However, if you notice that your plant isn’t growing and continues to have purple leaves, feed your seedlings a diluted fertilizer with a balanced NPK.
Every year growing from seed brings new experiences..
and in those experiences we have the opportunity to learn and grow. A mistake or issue that you encounter this year is a lesson for the next. The interesting thing about growing living things is that each year is different to the next, so you’re guaranteed to experience something new. The first year we got aphids on our seedlings was the worst! We didn’t even know that it was possible! But now we know to look for signs of pest damage and our seedlings have come out stronger for it.
Finally, if things aren’t looking up for you and your seedlings, remember that there are nurseries, garden centres and farmers that have seedlings for sale. Try again for a fall garden, and write down your learnings for next season.