Worm bins are such a great way to use your discarded produce and turn it into black gold. Worm bins work well in homes, apartments or condos because they’re small and don’t smell. Plus if you live in a place without green waste pickup, or if you have to pay for the weight of your garbage, worm bins will remove that extra weight and will give you soil in return. It’s a win-win!
Worm composting is when you use a specific type of worm to turn your produce waste into soil (called worm castings). It’s also called vermicomposting so if you see either title, they are one in the same.

This blog is reader supported. Some links in this article are affiliates which earn us a small commission, at no extra cost to you.
Worm composters are small bins that you fill with food, paper and worms that slowly work to decompose your food into worm castings. Because of their small, compact nature, you can have a worm bin anywhere you live. Whether you live in a home, condo or apartment, worm composters don’t take up a ton of space, or smell. If you do decide to get a worm composter, just be mindful that it should never be put in a place that receives direct sunlight that can heat up the bin. Keep it away from any windows that receive direct sunlight.
Worm composters can take up to a year to be functioning at full capacity. But as you approach that year mark, these worms can eat a TON of food. Sometimes we forget just how fast they can eat and they run out of food before we give them their next feeding. when you purchase a worm bin it will come with instructions on how to set it up, however it’s fairly straight forward.
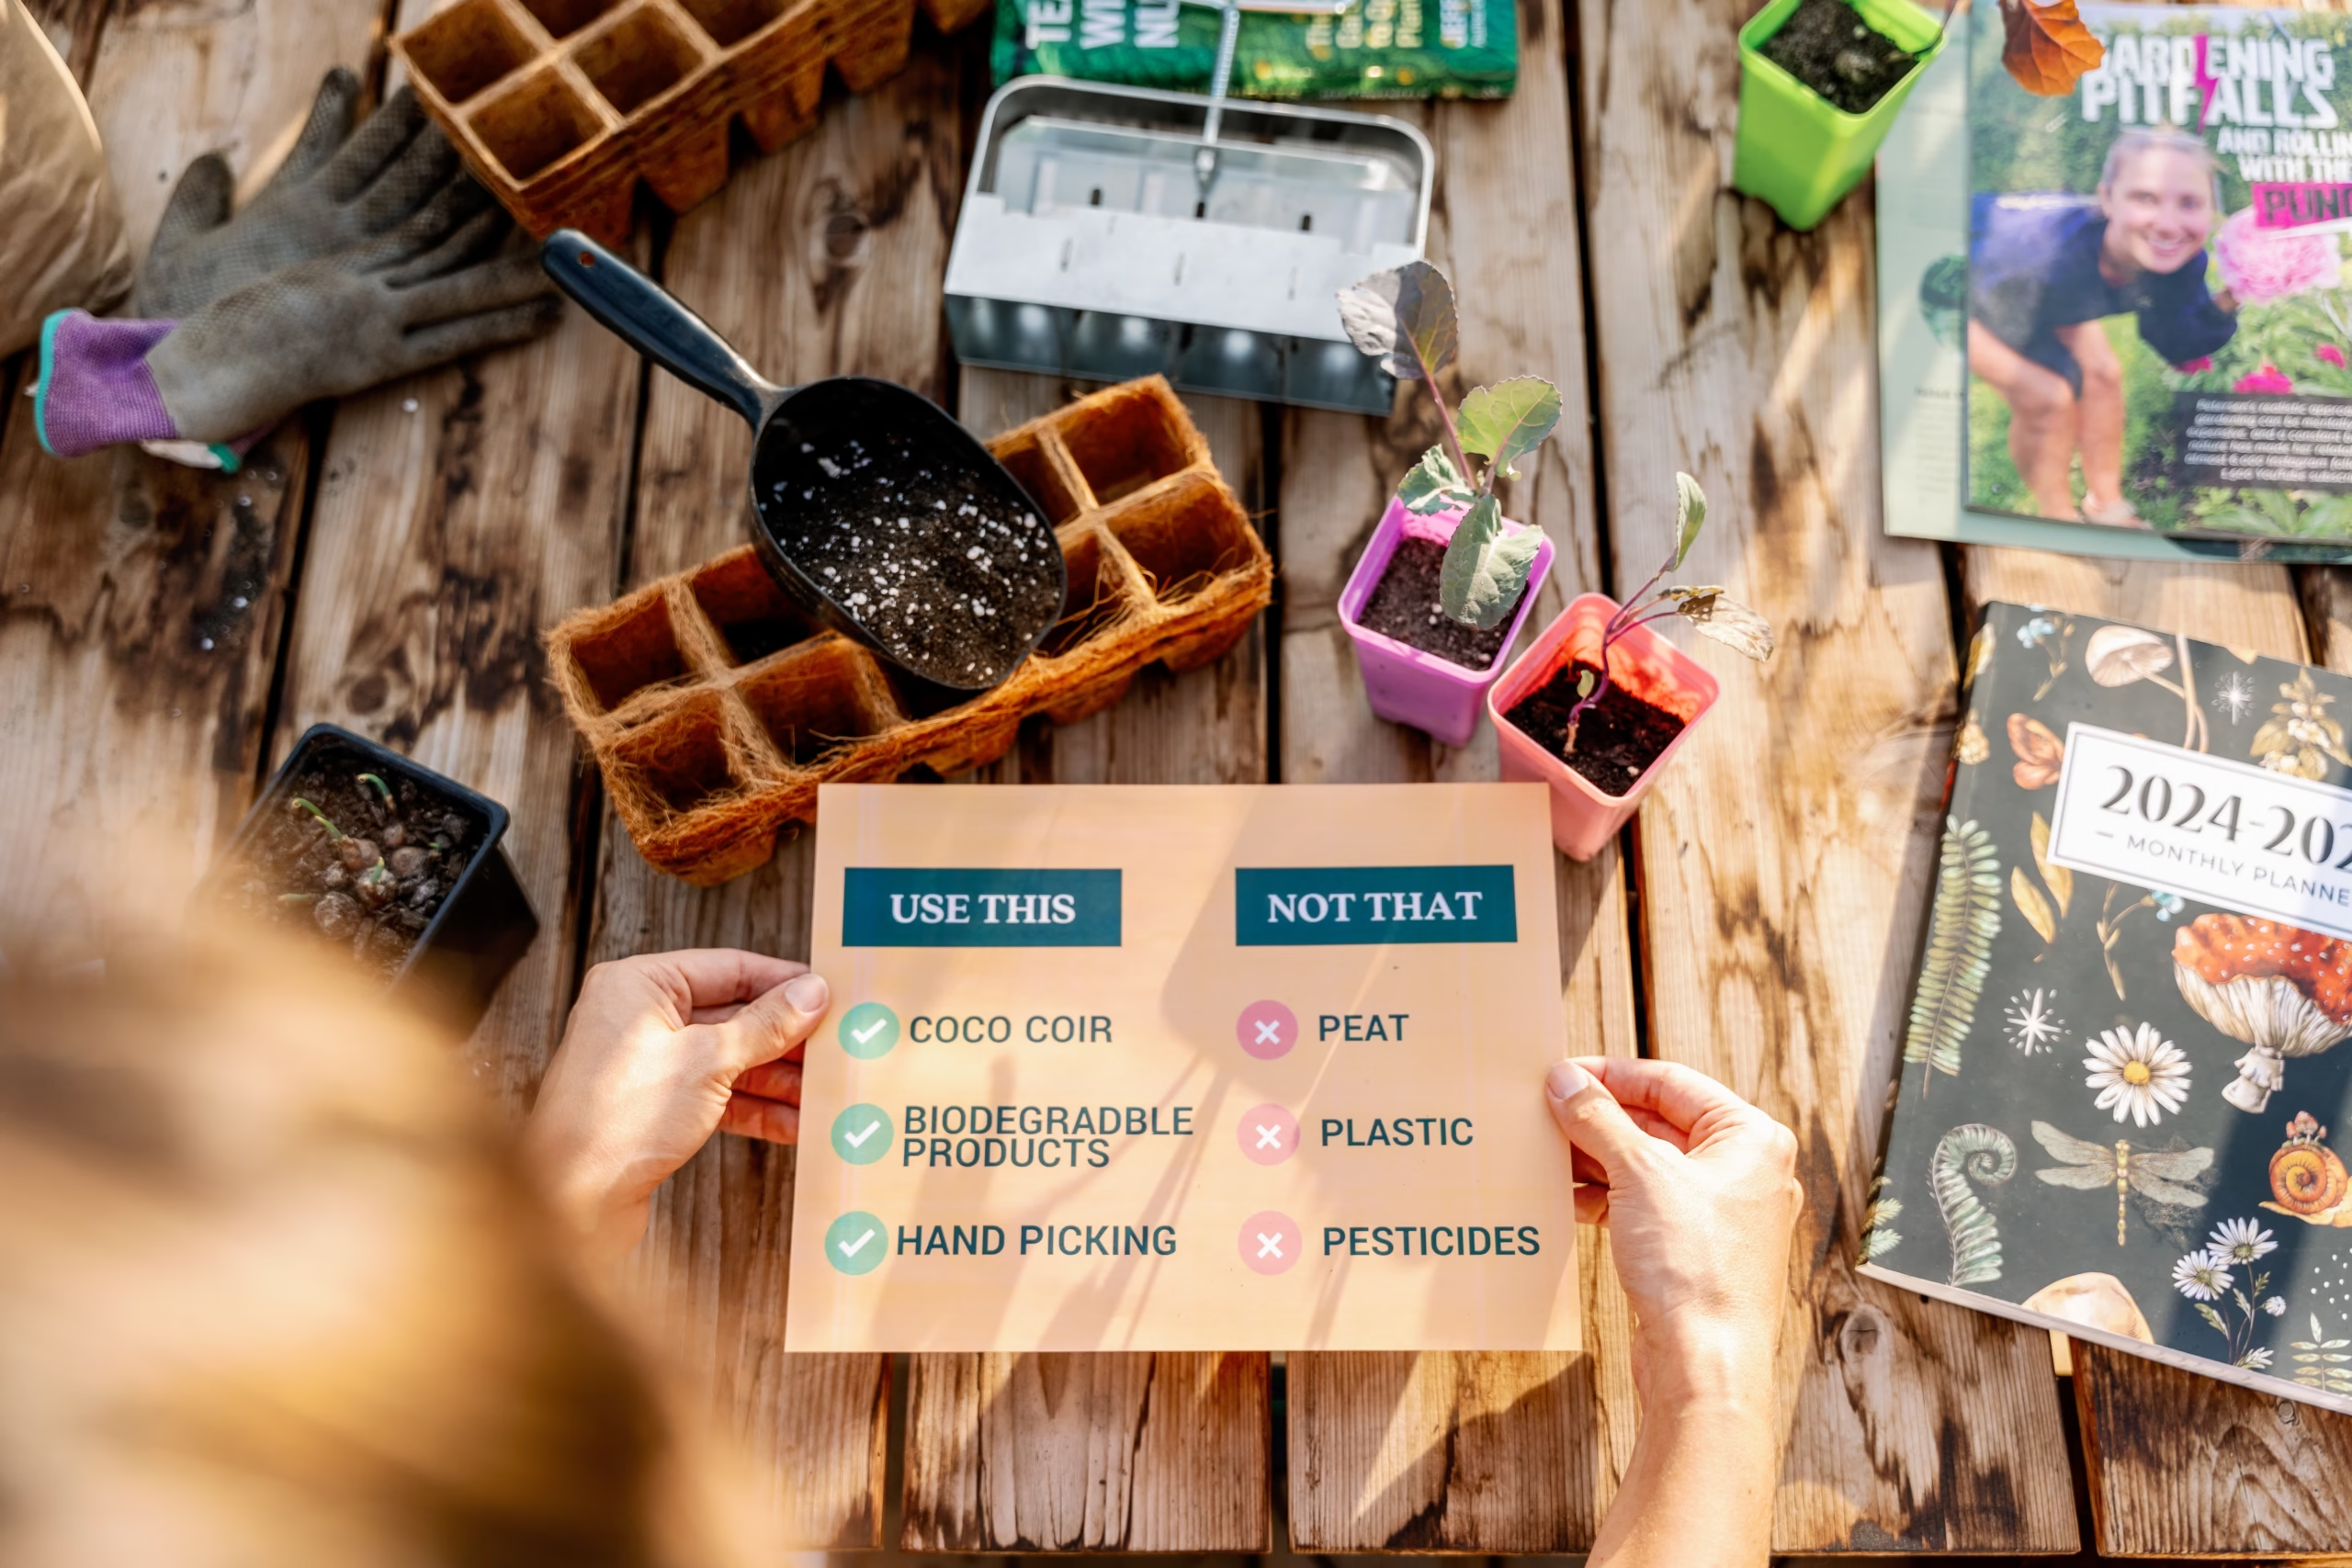
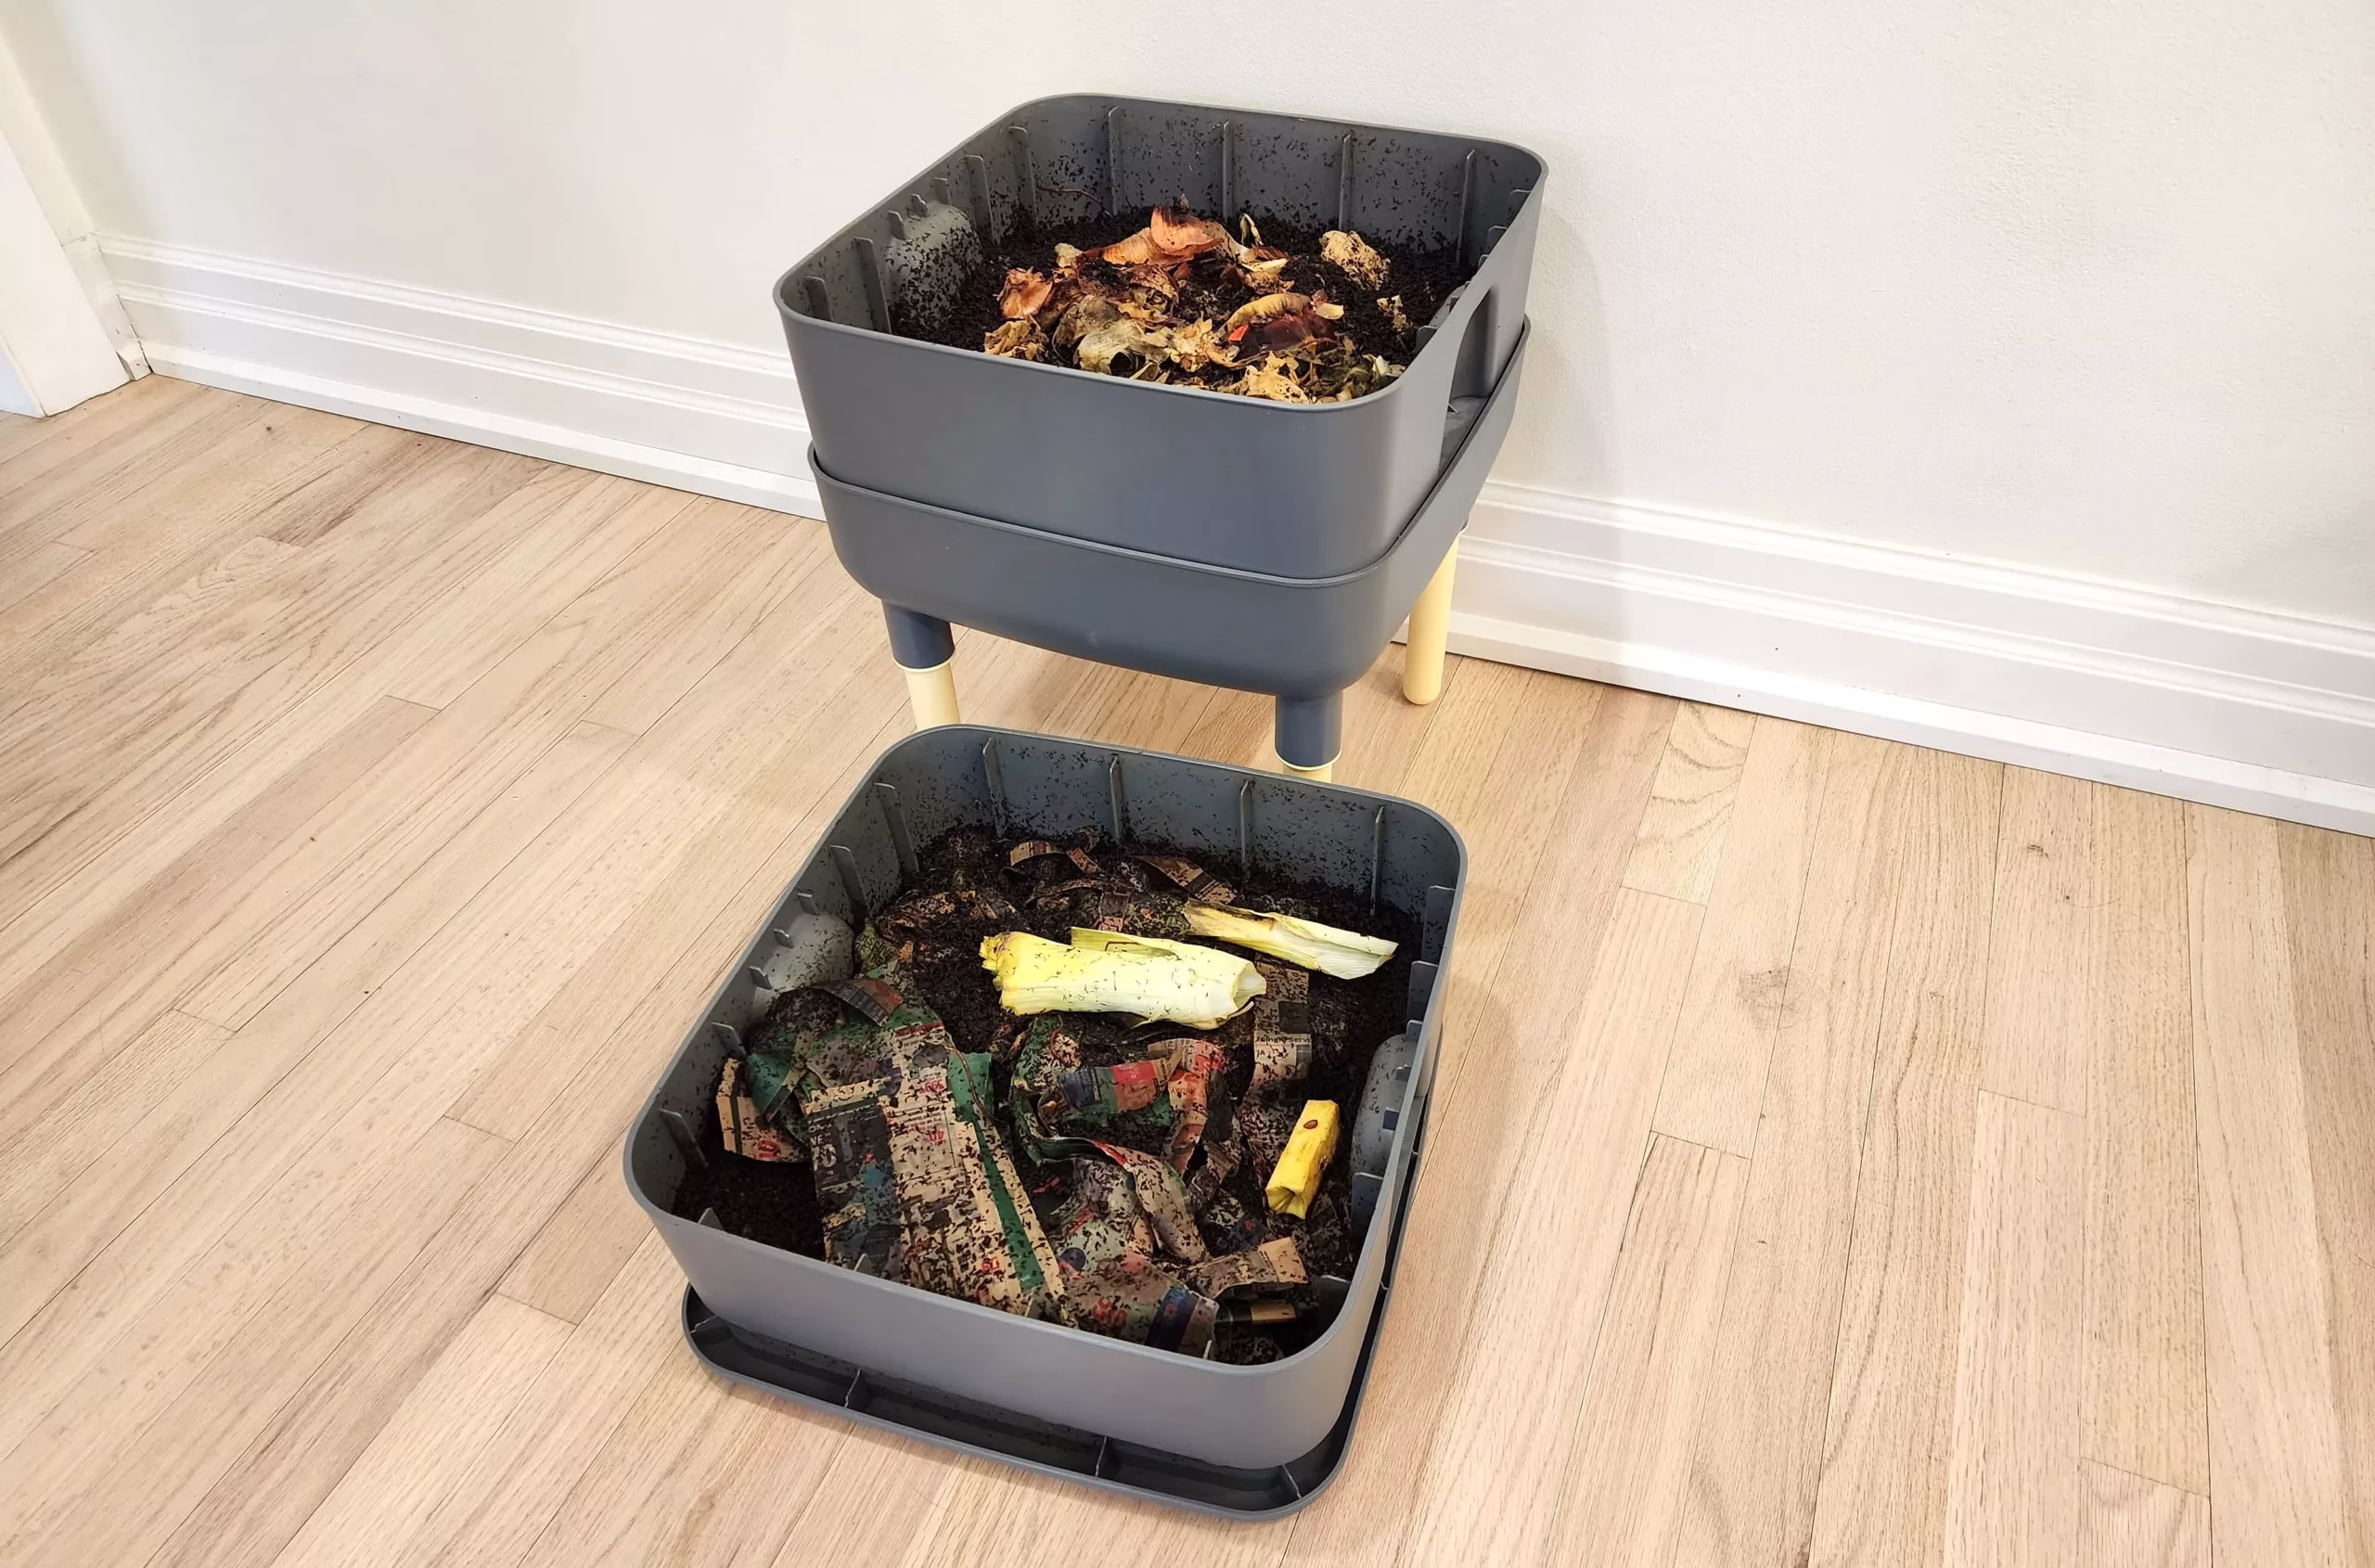
Fill your worm bin with some moist (but not dripping) coco coir and ripped up paper shreds. We always use flyers since they come in the mail regularly. You can either tear it or cut it into strips, the smaller the pieces, the easier the worms can eat it. Fill the bin 1/2-3/4 full of bedding. Once their house is ready you can add the worms. Just make sure that it’s not soaking wet in the bin, and if it is, drain any excess water before moving them in.
The best type of worms for a worm bin are Red Wigglers and they are becoming much easier to purchase as more people start worm bins. A quick internet search of your city name + red wigglers for worm compost should give you locations of where they’re sold. If you can’t find any, I recommend posting on your neighbourhood group because there might be someone nearby who has worms to sell or donate to your bin.
The most important thing about your worm bin is to know what you can feed them, and how much to feed them. Overfeeding your worms is a sure way to kill them. You can feed your worms any food from your kitchen, except for citrus, oily foods and meat/dairy. After a year you can start adding small amounts of citrus into your worm bin, but we just choose to avoid it altogether. Their favourite food is watermelon, so if you have that, it’s definitely something you’ll want to give them.

When you first add your worms to the bin, wait 1-2 days before you feed them. And try and avoid opening the bin over those 2 days to give them time to adjust. For the first month you can feed them 1-2 cups of food a week. If you divide the worm bin up into quadrants, and put the food in one spot at a time, it’s an easy way to watch how fast the worms are eating, and to keep track of how much you’ve fed them.
For months 2-4 you can increase the feeding to 2-3 cups a week. And months 5-7 you can begin feeding them 4-6 cups a week. Finally after 8 months and onward, you can feed them 6-10 cups a week. The most important thing is to make sure that whenever you feed them, there isn’t a ton of food still remaining in the bin, otherwise you’ll begin to overfeed them, and your bin will start to smell.
In order to reduce the chances of fruit flies in your compost, freeze any food you plan to feed the worms first. Let the food warm up to room temperature and then you can feed them. The smaller the food pieces, the faster they will eat it, however we often throw in fairly large pieces of food and they will finish it off, it just takes more time.

Worm bins need to stay evenly moist. You don’t want them drowning in liquid, but also the soil should never dry out. You want it to stay the consistency of brownie batter. If your bin is too wet, add cardboard or paper to help soak up the liquid. You can also drain the liquid and use it as worm casting fertilizer. If your bin is too dry, add some shredded paper that has been soaked in water to the bin. You can never have too much newspaper shreds in your worm bin.
Overfeeding your worm bin can kill them, but can also lead to a smelly bin if the food begins to rot before it gets eaten. If you go to feed your worms and notice quite a bit of food from the previous week is still in there, consider feeding them less, or skipping the week. As long as there is paper shreds in the worm bin, they can switch to eating the paper if the food runs out before you feed them again.
On the opposite end, underfeeding your worms can also kill them. However, as long as you continue to add paper shreds to the worm bin, they can always change over to the paper until more food is delivered.
Feeding your worm bin the wrong kinds of food (dairy, meat, oily food and citrus) can lead to a smelly worm bin so avoid these foods.

You can begin harvesting from your worm bin one year after you started it. It’s helpful to harvest at least once a year to help make room in the bin for more food. There are a few different ways you can harvest from your worm bin, but the easiest one we have found is to spread out a protective cloth on your table and to make different clumps. From here, allow the worms some time to crawl into the middle of the clump and you can slowly skim the castings off the edges of the clump until you find worms. Allow them to move into the middle again and do this until the centre is all that’s left. Return the worms back to the bin and keep the castings separately.
Another option is to start only feeding one layer of the worm bin or just one side of it. Then, all the worms will migrate over to the other layer or one side of the bin and you can harvest the other side. Be mindful there might be some stray worms in the portion you’re harvesting so if you want to put them back in the bin, just do a quick search for them.

The two main ways to use your worm bin is to make your own soil using the worm castings, or by taking the liquid from the bin and making your own worm casting tea. And before I go any further, no, you do NOT drink worm casting tea. It’s liquid fertilizer for your plants!
When making worm casting tea, either give it to your plants in small quantities or dilute it to help it extend further. The benefits of worm casting tea is all the microbial life inside of it. It does have some nutrition to it, but it’s often low; 2-2-2 or lower.
With worm casting soil you can either add it to your houseplants or use it in your seed starting soil. By changing the quantities you can change your seed soil into potting soil – but just remember that the nutrition level is low so you might have to supplement your seedlings over their growing time.